The HEIC format, commonly used on Apple devices, relies on advanced compression to minimize storage usage. Yet, despite its efficiency, it’s not universally supported across all platforms. For better compatibility, JPG remains the go-to format — it's easy to open, edit, and share on nearly any device.
This guide will show how to get a JPG file on any device, step by step.
Why convert HEIC to JPG?
Converting HEIC images to JPG can be beneficial for several reasons:
JPG works with anything. Unlike HEIC, JPG opens easily on nearly any device, app, or browser — no errors, no weird compatibility issues.
Easier to print. Many printers, especially older ones, handle JPG better. Converting helps avoid any hiccups when it's time to print.
Better for editing. Most photo editing tools are built to handle JPG. You won’t need extra steps or workarounds to make quick edits.
JPGs are easier to share. Whether you're sending photos to friends, uploading them online, or dropping them into a doc, JPG is the most compatible choice.
All right, let’s get down to what PDF Guru suggests first.
How to convert HEIC to JPG with PDF Guru
First off, go to our HEIC to JPG converter and follow these steps:
- 1Upload or drag your file into the box.
- 2Wait a few seconds for the tool to transfer HEIC to JPEG format.
- 3Download your new file — we’ll also save it to your account.
Want to convert your photos to more formats? Our converter handles everything from GIF to JPG, PNG to WEBP, JPG to PNG, and beyond.

How to convert HEIC to JPG on Windows 11
You can also change a photo from HEIC to JPG format with the Photos app, which you can find on any PC. Just follow these steps:
- 1Open your HEIC file in the Photos app.
- 2Click the "…" icon in the top-right corner.
- 3
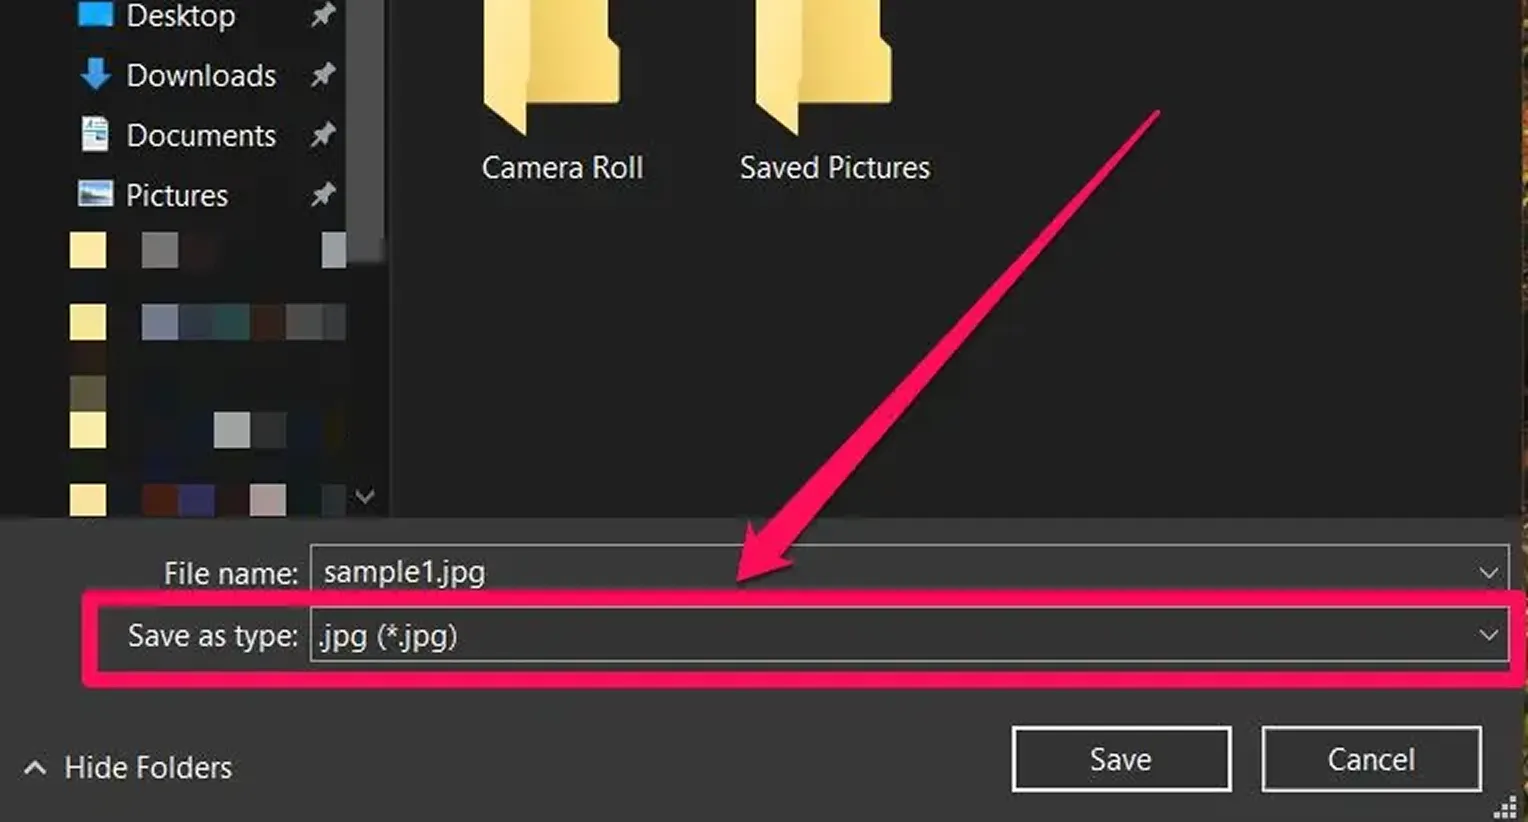
- 4In the "Save as" type field, choose ".jpg" or ".jpeg."
- 5Choose a folder and hit "Save," and you’re done!
How to convert HEIC to JPG on Mac
No extra tools needed here — just use the Preview app to change HEIC to JPG format on Mac.
- 1Open the HEIC file in Preview.
- 2
- 3In the "Format" dropdown, choose "JPEG."
- 4Use the quality slider to adjust the image quality.
- 5Rename the file and choose where to save it.
- 6Click "Save."
How to turn HEIC into JPG on iPhone

Here is how you can use the built-in Files app to convert your image:
- 1Open "Photos" and select your HEIC image.
- 2Tap "Share" > "Copy Photo."
- 3Open "Files" > "On My iPhone."
- 4As an optional step, create a new folder.
- 5Open the folder, long-press, and tap Paste.
How to batch convert HEIC to JPG
There are two offline ways to convert multiple HEIC files to JPG:
On macOS:
- 1Select HEIC files in Finder.
- 2"Right-click" > "Quick Actions" > "Convert Image."
- 3Choose JPEG and click Convert.
On iPhone:
- 1In Photos, select HEIC images > "Share" > "Copy Photos."
- 2Open Files app > "On My iPhone."
- 3As an optional step, create a new folder.
- 4"Long-press" > "Paste."
- 5Get your auto-converted files in JPG format.
Unfortunately, Windows doesn’t make batch conversion easy — you’ll have to select HEIC files one by one.