Creating a PDF with images is a common task across professions — whether you’re a marketer, designer, or CEO trying to make a presentation more engaging. Visuals can make a huge difference in getting your message across.
So, in this guide, we’ll show you how to add images to PDF files. And for the most precise and user-friendly solution, we recommend trying PDF Guru, our online tool.
How to insert images into PDF using PDF Guru

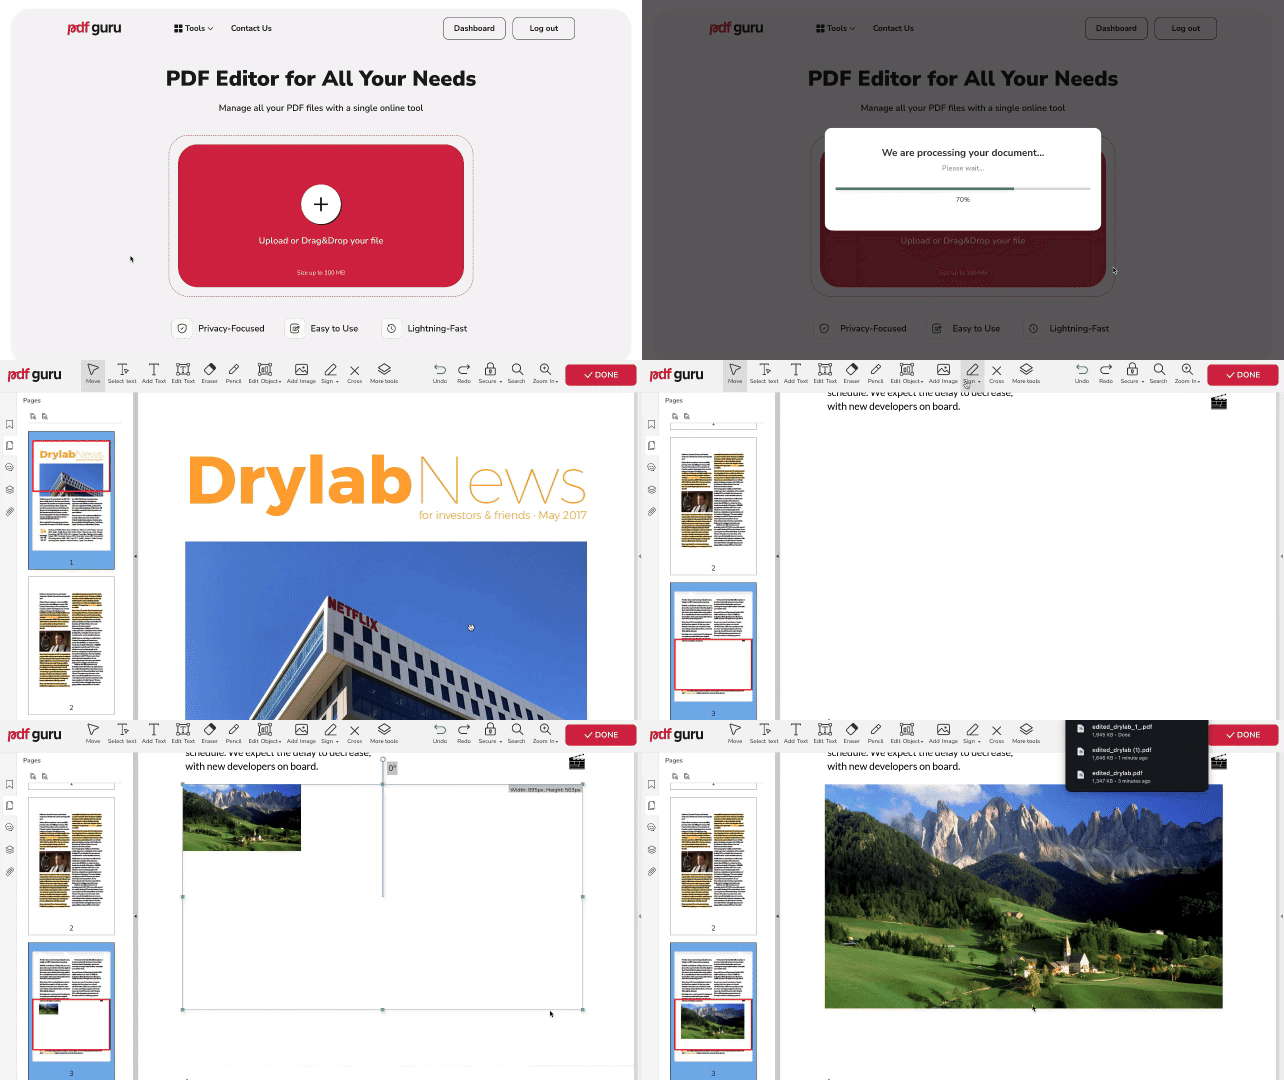
We've optimized the process to be simple and quick — just follow these steps to add an image to PDF:
- 1
- Go to our online Edit PDF or access it through Edit & Sign in the top menu.
- 2
- Upload your file into the window and wait for it to load in our PDF editor.
- 3
- Choose Add Image from the toolbar and select the image you want to add.
- 4
- Place the image where you want it and resize as needed.
- 5
- Click Done, choose the file format for saving, and then hit Download.
Whether you need to add photos to PDF, or make any other changes, our tool ensures a seamless experience. Read on to explore additional features and tips.
Accepted image formats
Our editor supports a variety of popular image formats, including JPG, PNG, TIFF, WEBP, and GIF. When you click on the Add Image tool, a dialogue box will open and these file in these formats will be selectable, making it easy to choose the correct files. For instance, to add PNG to PDF, you need to choose the image from the directory.
If your image is in the wrong format, our tools make it easy to convert — SVG to JPG, HEIC to PNG, GIF to PNG, and more!
How to rotate images left or right
Once you’ve added an image to your PDF, you might want to adjust its orientation. Here’s how:
- 1
- Click on the image to activate editing mode.
- 2
- Find the circular handle just above the image frame.
- 3
- Drag the handle left or right to rotate the image file to your desired angle.
How to delete added images
- 1
- Right-click on the image
- 2
- Select Delete.
How to adjust image transparency
- 1
- Right-click on the image and select Properties.
- 2
- Drag the slider left and right to adjust the opacity.
Can I add pictures to PDF on Mac?

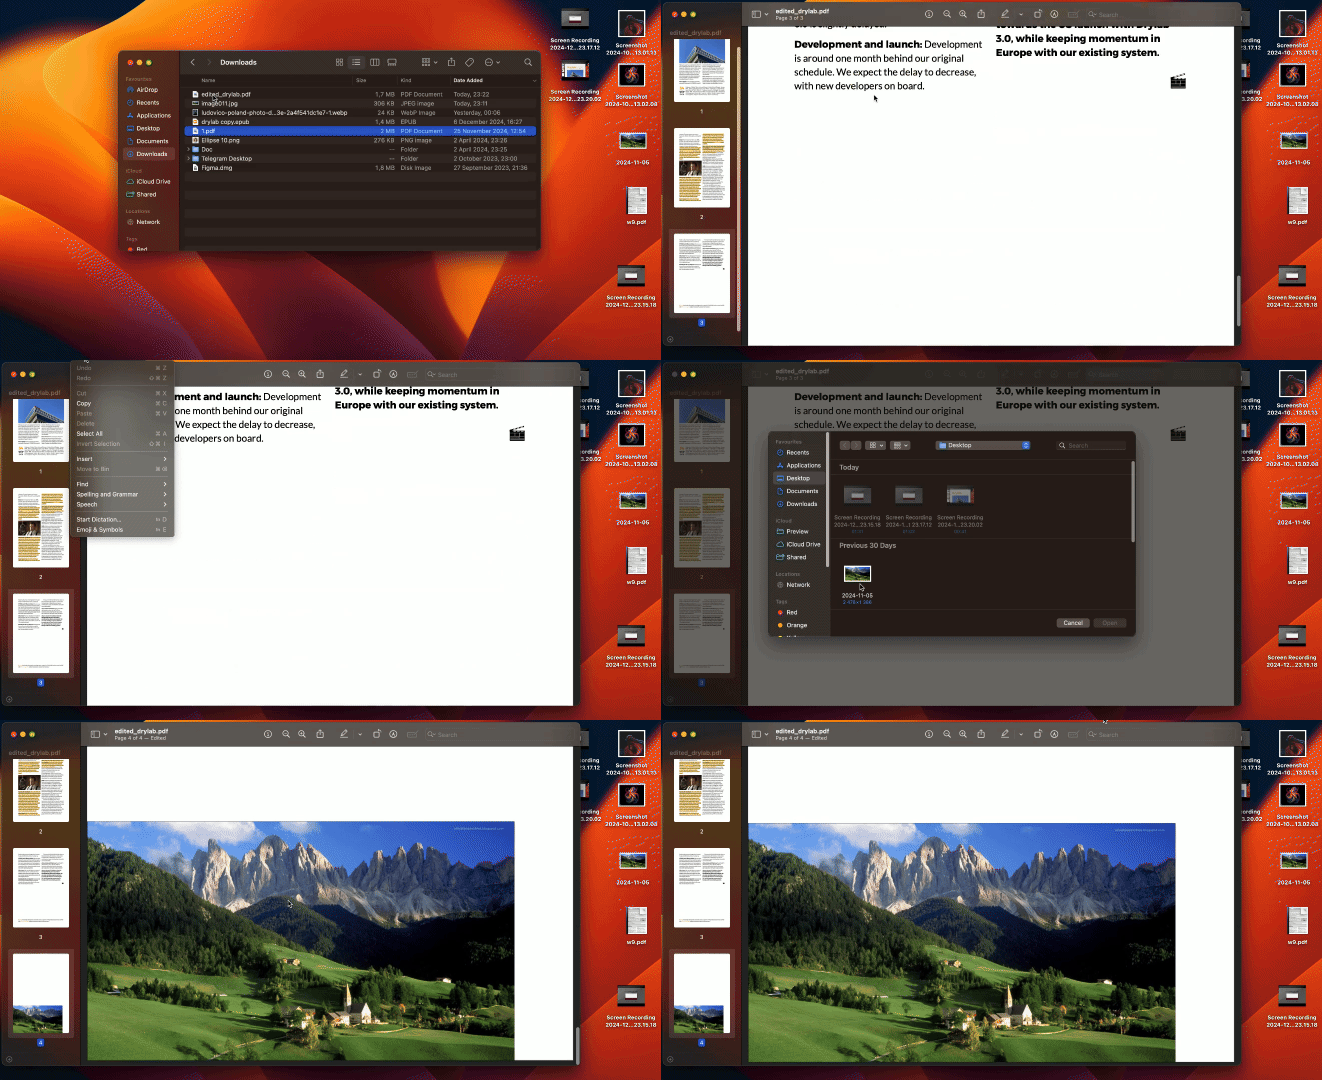
You can use Mac's native Preview application to attach images to a PDF file, but they will be added as a separate page. If this works for you, follow these steps:
- 1
- Open your PDF file in Preview.
- 2
- Click Edit in the menu bar, then select Insert → Page from File.
Each image will be added as a separate page at the end of the PDF, but you can reposition them however you like.
If you want to put images into PDF pages directly, PDF Guru makes this process easy and works on any device or operating system, including Mac.
Bonus: How to secure your PDF online

Once your PDF is ready, it’s wise to protect it with a password, especially if it contains sensitive information. This will help keep your data secure and prevent unauthorized access.
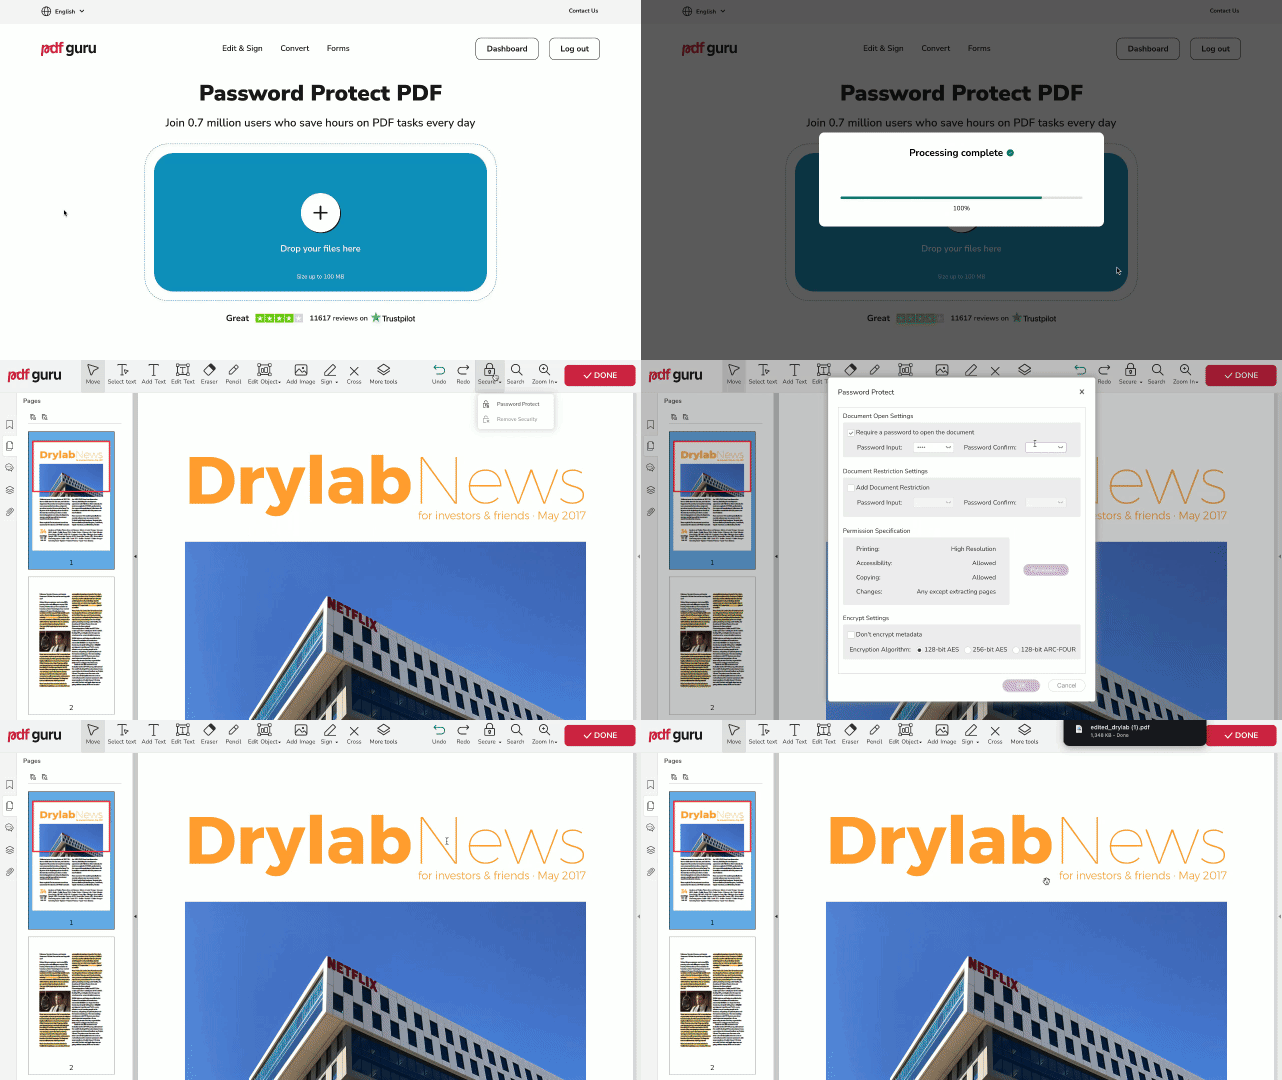
Follow these steps:
- 1
- Go to the Password Protect PDF option or access it through Edit & Sign in the top menu.
- 2
- Upload your file to the window.
- 3
- Select Secure → Password Protect from the top menu of the PDF editor.
- 4
- Review and complete the required fields in the settings panel.
- 5
- Click Done to complete, select your preferred file format, and then Download.
You can also add a password while editing your PDF document. Just click on the Secure option in the top menu and follow the steps mentioned above.
You should also check out our guide on how to password-protect a PDF document. It explains why password protection is important, covers the basics of file security, and walks you through the process using different tools.
